
How to create a Jenkins pipeline in multiple branches automatically?

Introduction

In the modern CI/CD setup, we may require to create a Jenkins pipeline based on the branches which are available in the SCM (Source Code Management). For example, the developer needs a Jenkins pipeline for his own feature/bugfix branch which can build, test and prepare the code coverage report. Manually creating this Jenkins pipeline for the new branches is not an effective one. So, we need an automation, which should create the new Jenkins pipeline whenever the developer creates a new branch in SCM. 

Jenkins Multibranch Pipeline

The Multibranch Pipeline allow us to automatically create a pipeline for each branch on our Source Code Management (SCM) repository with the help of Jenkinsfile.

How to setup Multibranch Pipeline in Jenkins

  1. Select New Item from Jenkins Dashboard

  2. Enter the project name in the Item name text box and select Multibranch Pipeline then click OK button.

  3. Select your version control software from the Build Source.

  4. Configure the SCM 

  5. Select the Discovery Strategy as per your need. It tells, when and which branch requires the pipeline.

  6. Click Save Button
  7. Add the Jenkins file (It contains the stages of Jenkins pipeline) into the repository branch.
  8. Click Scan Repository from Jenkins menu.

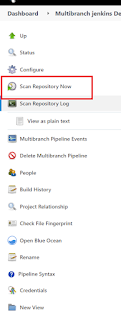
  9. Jenkins will create the pipeline for the branches which contains the Jekins file. Check the Scan Repository Logs for the results.

  10. Select the project name from Jenkins Dashboard, It will contains the list of pipelines for the branchs.

Jenkins File

The Jenkins file contains the information about the pipeline stages, It needs to be added in the SCM branches whereever we required the pipeline setup.
The sample Jenkins file is avaiable in the Github link

Comments

Popular posts from this blog

Implementing Turn-by-Turn Navigation with the GraphHopper Routing Engine

 Introduction to Turn-by-Turn Navigation Turn-by-turn navigation is a feature that guides users through a journey step-by-step using voice or visual prompts. It is typically found in GPS navigation apps and can be used for driving, walking, and biking. When it comes to the actual implementation, turn-by-turn navigation utilizes several technologies such as GPS, maps, and routing algorithms to guide users along the best route to their destination. In this article, we will explore the implementation of turn-by-turn navigation using the GraphHopper library and OpenStreetMap data. Understanding the GraphHopper Routing Engine GraphHopper Routing Engine is an open-source routing library that allows developers to calculate efficient routes for various transportation modes, such as cars, bikes, and walking. It utilizes OpenStreetMap data to generate a routing graph, which is then used to calculate the fastest or shortest routes between two points. GraphHopper is written in Java and can be ...

Gobichettipalayam - Kutti Kodambakkam

Android application test automation

Test automation for mobile applications  In the mobile application development, testing plays the major role to ensure the quality.  The test automation process helps to speed up the testing process while doing the more regressions. In this article, we are going to see about the Appium test framework and how it is used to automate the Android application testing. What is Appium? Appium is an open-source framework that allows QAs to conduct automated app testing on different platforms like Android, iOS, and Windows. Appium frameworks allows to create a test scripts in different programming languages like Java,C,C#. Architecture Appium is a node.js webserver it contains the implementation of Selenium webdriver and REST API. Source:  nishantverma.gitbooks.io Appium client libraries Appium provides the client libraries in different programming languages. These client libraries are used in the test scripts to fire the test.  Appium client library communicates with the App...